High-Intensity VR Fitness App. Designed to transform exercise into a fun and rewarding experience!
Custom Environments Add-on
Using Custom Environments
PowerBeatsVR comes with four pre-built environments (or “stages”) to train in – Sky, Desert, Medieval and Space. Now, starting from version 3.4, you have the option to get the Custom Environments add-on to create your own environments using 360° panoramic images called skyboxes. A skybox is basically an image that is projected around you in 360° and serves as your visual environment while you play.
You can choose from several internal skyboxes that we’ve bundled as part of the add-on, but you can also provide your own files. You can also configure the rotation of the skybox, as well as the position of the sun. There are several websites where you can find skybox images. You can also download skybox images from Google Street View, or use your own camera to create your own images (e.g. of your own backyard).
Where You Can Get the Add-on
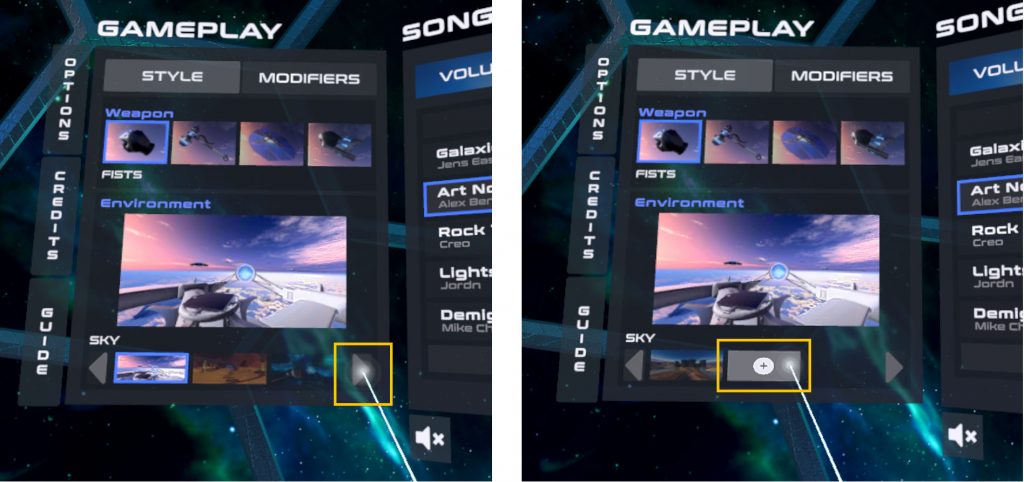
- Just start PowerBeatsVR and go to the STYLE tab in the GAMEPLAY panel of the main menu.
- Then navigate to the right in the environments list (>) and click on the (+) button to add further environments.
- A dialog will show up where you can get the Custom Environments add-on.
Alternatively, you can also get them on the store page of your chosen VR platform, if you are playing on Steam or Oculus Rift.
Skybox Formats Used in PowerBeatsVR
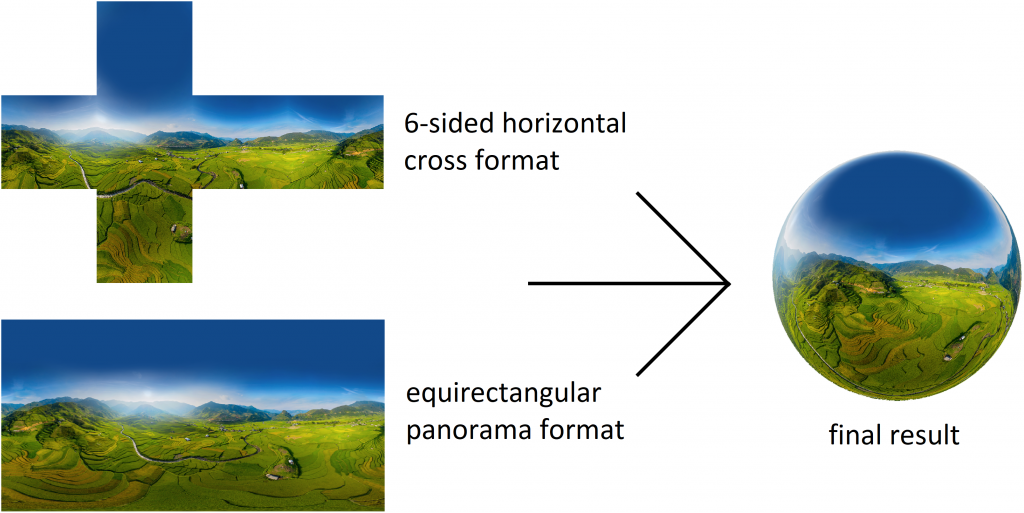
PowerBeatsVR accepts skyboxes in either equirectangular panorama or 6-sided horizontal cross cubemap format. Such skyboxes are usually saved as PNG or JPEG image. This format will then be internally converted to a spherical environment, as shown in the following picture.
Adding Your Own Environment
To add your own environment, click on the STYLE tab in the GAMEPLAY panel. At the bottom, you’ll see a horizontal list of all available skyboxes. Navigate to the end of that list (>) and click on the last one with the (+) button to add a new environment. Here, you’ll be asked to provide a skybox, its rotation, and (via the grab button) the sun position.
You can either select one of the internal skyboxes (provided by us), or you can choose a file on your computer or devices which you’ve downloaded beforehand. On Quest, you need to either download the skybox files using the Meta Browser on the device, or copy the files over via USB.
You can search for skyboxes online:
- Shutterstock
- Adobe Stock
- Google Images: Skybox / 360° panorama
Here are some of those websites where you can find beautiful panorama images for free:
Download Awesome Skybox Images From Google Street View
Open Google Maps, drop into Street View wherever you want and just save that view as a skybox useable with PowerBeatsVR.
Here is how: Skyboxes from Google Street View
Create Your Own Skyboxes
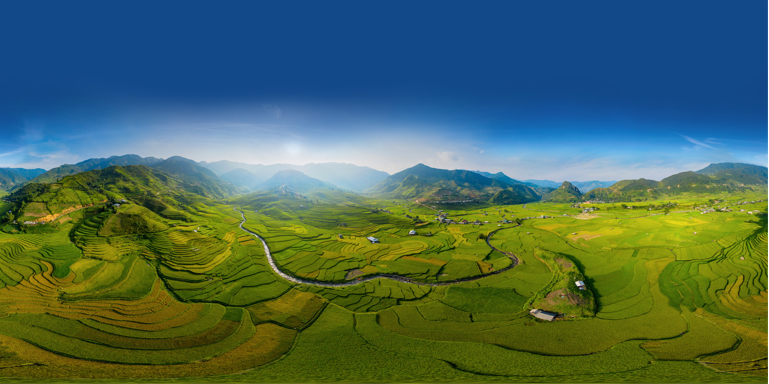
You can also create your own skyboxes. A skybox, as you’ve seen above, is not merely a 360° panorama shot – it must also include the top and bottom (sky and ground). Besides the name “skybox“, this format is sometimes called a “photosphere“, or a “360×180 picture“. A photosphere picture looks like this (note the distortion at the top and bottom):
Ways to create your own photosphere:
- A simple way to create a photosphere on Android is Google Camera, which directly creates a PhotoSphere and walks you through the process of creating the single pictures needed for it.
- The easiest way to create a professional photosphere is using custom hardware. As an example, the GoPro Max 360° camera is able to create that format with a simple button click. The older Samsung Gear 360 camera also does a good job directly creating ready to use images.
- Finally, you can also take individual high-res pictures using your phone or DSLR camera, and then combine the result into a photosphere with a dedicated software. This process is called stitching. Examples of software which do this are Microsofts Image Composite Editor, Hugin, or PtGui.
Closing Words
Have fun! And let us know on Discord if you’ve found some great skyboxes to use with PowerBeatsVR and want to share them!